Showing posts with label dinner. Show all posts

Saturday, April 21, 2012

LC's Lighter Loco Moco


 Let me tell you about a little something called compromise. This is a pretty common word in relationship-land, and becomes a bigger deal when it comes to eating habits it seems. Let me tell you how my seemingly mundane world operates. When cooking for two, sometimes your partner just doesn't feel like having what you planned out. Then they suggest something that isn't really healthy. Sometimes you get to make two meals, but the husband is cute in the way he only wants to share one meal together. It's a spiral that can lead to eating bad, which is fine sometimes. Compromise is when you ask if it's okay that you alter your version and let him have his.

 If you have ever been to Hawaii, I am almost certain you have heard of Loco Moco. If you have not, Loco Moco is a local favorite that consists of a bed of rice layered with hamburger, brown gravy and a runny fried egg. Terrible for your arteries? Probably, but it seems like calorie count matters little when it comes to the yum factor. Loco Moco is also one of the husband's favorites, for good reason. It is surprisingly tasty! With a slight adjustment, and portion control this whopper of a meal doesn't have to damage your waistline too much. Be advised, I will not teach you how to properly cook rice. Why? I am a rice wizard.

Not really.. I have a rice cooker.

LC's Lighter Loco Moco
Serves 1
Calories per serving: About 417

1 Boca Burger patty (the 70 calorie variation)
1 egg
1 cup of cooked white rice
1/4 cup of prepared brown gravy (I use the little packets that you just add water)


  With this meal it's kind of time sensitive. You can't make everything at once, or you risk something getting cold or something being done out of order. There is method to my madness! With that being said, start by preparing your rice. If you have a rice cooker this will take 15 minutes or so anyway. While the rice is cooking, pre-heat a medium skillet on medium heat. Place the Boca patty into the skillet and cook for 4 minutes. Flip and repeat another 4 minutes for the other side. Plate the patty and put it to the side for now.

  You can either wait for the rice to be done, or nearly done to make your brown gravy. Keep in mind 1/4 cup of brown gravy only adds 20 calories to the meal. If you want to go a little crazy with it, by all means do so. Make the gravy according to the packet directions. Honestly you don't have to be fancy and make gravy from scratch, as this one works really well for the flavor as is and is easy.


 Once the rice and gravy are ready, it's time for some quick construction. Put the rice in a bowl and make a nice little bed. Top it with the patty and drizzle the gravy on top of it all. As you can see, I have a his and hers version! Now it's time for the final step!


  Crack the egg in the same skillet that was used for the patty. You can see some grease there from the hamburger I cooked too, which is perfectly fine to leave there. I usually stand there and wait until the white around the yolk looks a little set, so I can't tell you the time frame of how long it takes. I keep the heat between low-hi and medium at this point. Flip when it almost looks set, let that side cook for a few seconds, then plate the egg on top of everything else.


  Perfection! For the non-locals, this is where it gets even better. With your fork mash up the Boca patty and egg. The yolk, gravy, meat and rice should all be combined evenly for maximum flavor. Would I eat this every day? Probably not, but it's still a great way to enjoy a wonderful dish and while controlling proper portions it isn't cheating too much! I rationalize that it's good for me since it has so much protein. Enjoy!


Thursday, October 20, 2011

Mom's stuffed peppers.

  Eek, sorry I disappeared for a week. As you all know, life happens. Things get busy sometimes. I've had a lot of medical stuff happening over the span of the last few days. It isn't all bad stuff, but it's positive. It's been a draining experience, so pardon my absence. I'm back now!

  One of the first things I remember from my childhood was having dinner every night together at the dining table as a family. We would always have a wonderful, full meal that my mother prepared. I remember my dad sometimes teasing her about her choice of dish, and how she would always get flustered. Mom's meals were always special, and will forever be special to me. I went through the devastating ordeal of losing her way too soon, my mother passed when I was only almost eleven. I will always feel the love and warmth she bestowed upon my sister and I, and always have a happy memory whenever I have the dishes she prepared for us when I was little. When I went back to visit my family in September, my father entrusted me with two special dish towels. Why are they special? They were mom's treasured towels. The ones that sat on the front of the oven for only decor, and if you touched them hell would freeze over. Fourteen years later, they are my treasured towels hanging on the front of my oven in our house. Mommy, this one is for you.

Mom's stuffed peppers
Serves two


2 green bellpeppers
1/2 lb ground turkey, preferably lean
1/4 of a white onion, diced
1/2 cup of pasta sauce, with a few tablespoons extra to top the peppers
1/2 cup of Mexican style rice
1/4 cup egg beaters (or 1 egg, beaten)
1/2 teaspoon of Worcestershire sauce
1/4 teaspoon salt
A few dashes of ground pepper

Optional: 2 tablespoons of mozzarella cheese

  Pre-heat oven to 350 degrees.


  Bring a large pot of water to boil. Cut the tops off of the peppers, and remove the seeds. Once the water is boiling, submerge both peppers in the water. Let them boil in the water for five minutes.


  In a separate bowl, combine the egg beaters, pasta sauce and onion. Mix well. Add the ground turkey to the mixture. Add all remaining ingredients except for the optional mozzarella and extra sauce. Mix well so everything is distributed evenly.


  After the peppers have boiled for five minutes, carefully remove them from the pot using tongs and rinse them in cold water. Place them into an oven safe dish. Split the filling in half, or distribute it so both of the peppers are filled to the top. I find this recipe always makes just enough to fill two larger sized peppers to the brim. Top with a bit of pasta sauce and a light sprinkle of mozzarella cheese if you wish. Cover with aluminum foil, and bake for 50 minutes.


  This makes for a fantastic, satisfying meal that is both low in calories but also packs a bit of protein. You can make this with plain white rice as well, but the flavor is not as good without the Mexican rice. Enjoy!

Thursday, September 29, 2011

Too good to be true: A low calorie version of hamburger helper!

  I'm going to be honest with you guys. When I first got married, we both were working 12 hour shifts, opposite of each other, so unfortunately Hamburger Helper became a staple in our lives. As tasty as it can be, it's incredibly bad for you and packs a whopping 320 calories for a one cup serving with most varieties. Low and behold, Hungry Girl came up with an excellent alternative that shaves 141 calories off! Bonus? You can make it in your crockpot. If you don't have a crockpot yet, I suggest you invest in one. This is one of the most versatile kitchen gadgets you can get, and is super for when you are busy.. or like me have the flu and feel awful.

Lean & Tasty Cheeseburger Helper
Slightly adapted from HG's Cheeseburger Mac Attack
Makes eight servings
Each 1 cup serving is only 179 calories!


1 1/4 cups of uncooked elbow macaroni (I use whole wheat with added fiber for extra nutrients)
10 ounces of raw lean ground turkey
1 teaspoon onion powder
2 tablespoons ketchup
24 ounces frozen Green Giant Broccoli and Cheese sauce
3 wedges The Laughing Cow Light Creamy Swiss spreadable cheese
Optional: Salt and pepper.

  Start by bringing a small pot of water to boil. Once the water is boiling, add your elbows. You will only want to cook these for 3 minutes. If you cook them for too long, they will get mushy during the slow cooking process.


  Roll up your sleeves! It's time to get your hands dirty again! In a small bowl, add your onion powder, ketchup and ground turkey. Mix until well combined. Add this directly into your crock pot. When your elbows are done cooking, drain, and add them into the crock pot.


  The last step is adding the 24oz of broccoli with cheese sauce into the crock pot. Break up any large clumps. Stir everything together in the crock pot so it is evenly distributed. You have the option of setting this on high or low. If you cook on high, this will only take 3 hours. Low will take 7 hours. Make sure you can check on this at least once during cooking, to stir and make sure it doesn't burn and stick to the sides. Cook until the turkey is cooked all the way through. When it is nearly done cooking, add the wedges of laughing cow into the crockpot. Recover the crock pot and allow them to melt a little.


  Add a few dashes of pepper to taste, and this dish is done! This is super easy, and a great way to get a few servings of veggies and fiber in. Enjoy!

Monday, September 26, 2011

Easy, low calorie turkey sliders!

  I've always had a fondness for burgers. Most people used to call me the burger queen, and not just because my working career began at Burger King. I earned this title with hard work. Hard work comprising of eating way too many cheeseburgers, and then I wondered where I gained all that weight from. A few years ago I was diagnosed with a chronic pain disease and discovered that red meat is more or less my mortal enemy. I found that when prepared properly, ground turkey is a pretty fantastic replacement. I introduced my husband to it without really letting him know it wasn't his beloved red meat, because I didn't want to be beheaded for the concept. Now it's a staple on our grocery list. This recipe is a fun, healthier spin on sliders that is easy to prepare and can be fun to make with other people too!

LC's Turkey Sliders
Slight variation from HG's Queen-of-the-Castle sliders.
Makes four servings.


Only 254 calories per 4-piece sandwich! YAY!


Roughly 10 oz of lean ground turkey. (I use about 3/4 of a 1lb package.)
8 slices of light bread. (You can use other bread, but using light bread makes it so the bread only adds 100 calories per sandwich as opposed to the 200 calories most other types will tack on.)
1/4 teaspoon garlic powder
1/4 teaspoon onion powder
1/4 teaspoon black pepper
1/4 teaspoon salt.
1 whole onion, white

Optional:
Real Bacon bits.
1 Laughing Cow light swiss spreadable cheese wedge


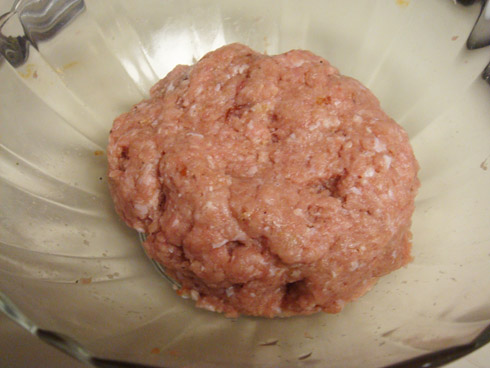
  Roll up your sleeves and prepare to get your hands dirty. In a medium size bowl, measure and dump all of your dry ingredients. Add the ground turkey into the bowl and mix WELL. I find using your hands works the best to distribute all of the ingredients evenly. Otherwise you might bite into an over-seasoned surprise! 


  Once your meat is well combined, make a small ball slightly smaller than the size of a ping pong ball. Flatten this out and place it on a plate. Repeat for the remaining meat. Remember you will need four patties per sandwich. It's okay to have really tiny patties in order to make enough to accommodate the recipe, it will actually fit better on the bread later. Once you are done assembling the patties, take a knife and poke four holes into each patty. DO NOT pierce all the way through, just enough to create a little slit. This helps the meat absorb the flavor of the onions during cooking. Place the dish with the patties into the freezer for at least five minutes. 


   Multi-tasking time! While your patties are stiffening a bit in the freezer, dice up your onion. I suggest making it relatively thin and cubed since it cooks nicely in the skillet that way. Pre-heat your skillet to medium. Once you are done, you might want to start toasting your bread. 


  When the five minutes are up (or a little longer if you want the patties a little firmer), spread about half of the diced onions around your skillet so it forms a bed. Place your patties, slit side down, on top of the onions. Place a cover over your skillet and allow to cook closed for three minutes. While these are cooking, I suggest cutting your slices of bread into four pieces. These will be your make-shift buns!


  This picture is a testament to how loved these are in my house. My husband was yelling at me how he wanted to eat, so I had to take a speed shot. See? I'm human too! When the patties are done cooking, distribute them evenly between the bread. Make sure you pile some onions on there! What's great about these burgers is there are a large variety of low calorie options to dressing them up a bit. Add a little bacon, or some laughing cow to snazz it up, or eat it plain. Enjoy!

Thursday, September 8, 2011

Oven Baked Bacon Ranch Chicken

  Sometimes you are going to judge me. I am totally fine with that. I also have a confession to make.


  Sometimes I beat my meat with a hammer. You should be proud, because prior to the hammer I was using a maglite like a rogue cop. When you can't find a meat hammer, it's amazing what you find that works! I'd just like to think of myself as creative, with a tinge of crazy. Either way, it makes making dinner a little more fun.

  We love chicken in my house, and I probably know how to prepare it in over a dozen ways. Most of those ways are in the skillet, so when I found a recipe to cook it in the oven I was a little curious of what the outcome would be. I find that cooking in the oven leaves you with a breast that is very tender, and cooked more evenly than in the skillet. (Not to knock the skillet, because it is still great!) One of the big things on my journey to eating better is that I did not want to sacrifice taste in my quest to lower calories and eat better. I'm not the type that can survive eating like a rabbit, or even try to pretend I love it. I still have rare encounters with salad, simply because I know there are better options! And what would life be like without bacon? It would definitely be a much sadder place.

Oven Baked Bacon Ranch Chicken
Slight variation of Hungry Girl's Ranch-o Bacon Chicken.
Serves.. as many as you want! This recipe can be made by the breast.
Calories per breast 186!


1 lean chicken breast cutlet
1/2 teaspoon of dry ranch dressing mix
1 tablespoon crumbled real bacon bits. (The type I use is Oscar Meyer. Don't get the fake ones!)


Switch it up!
  If you feel like mixing this recipe up a bit, you can substitute the 1 tablespoon of bacon bits with 1/2 tablespoon of French's Fried Onions and 1/2 tablespoon of bacon bits. The calorie count will remain about the same and give it an extra boost of flavor.

  Start by preheating your oven to 375. Have a cookie sheet prepared with either aluminum foil, or you can just add a little oil to your pan and coat it evenly.

  Now you are going to take your chicken breast and pound it until it is nice, flat and even. I usually do this by placing a sheet of clingwrap on my work surface, placing the chicken in the middle, then draping half of the cling wrap over it so the chicken is completely enfolded. I then beat it with my wonderful hammer until it has spread out a little bit and appears to be even. Unfold the clingwrap and place your chicken breast onto the cookie sheet. Repeat for remaining breasts, if you have any.


  Next you are going to take 1/2 a teaspoon of dry ranch mix and coat the top of the chicken breast with it. I find it spreads better if you almost use a sifting motion with your measuring spoon so it sprinkles onto it, then spread it a bit with your hand so it is evenly coated. Some will collect in the crevices of your chicken, but that is okay!

 
  Sprinkle 1 tablespoon of bacon bits over the chicken. Once you have done this, gently press the bacon bits into the breast so they are sticking to it pretty well. Most of the top of your chicken should be covered in bacon at this point. Yum! If you noticed, the second chicken breast in the photo has less bacon, but that's because I added 1/2 tablespoon of French's to switch it up a little. Repeat this for all of the chicken you are cooking.

  Place the cookie sheet into the oven. Allow to cook for 20-25 minutes. For my oven, I leave it in for the full 25. Your house is going to smell amazing within the first five minutes, and make you wish those 20 minutes were over!


  This dish is an excellent example of how you can have something indulgent, without adding a ridiculous amount of calories. Baking in the oven really makes the flavors combine well with the meat, and also helps drain excess fat. I usually pair this with green beans, but I bet a baked potato would be fantastic too. Enjoy!

Tuesday, September 6, 2011

I Can't Believe it's Zucchini!

  Who are you and what have you done with Lauren!?

  That's what anyone who has known me for longer than three years would say if they heard I ate an entire meal that consisted entirely of vegetables. The me from three years ago would be scoffing at me. That was the me that was enamored with Doritos after working a 12 hour shift dispatching, and putting away a microwave pizza before bed without thinking twice about the repercussions. I guess maybe hitting my mid-twenties was sort of a wake up call that my body won't love me forever.

  My husband has expressed a fondness for zucchini. We started by slicing it and pan-frying it in a bit of butter, then branched to zucchini fries baked in the oven and now we are taking it to a new dangerous level: zucchini fritters. I was honestly never a huge fan of zucchini, not going to lie. The only way I would ingest it was in the form of zucchini bread, which i'm sure eliminates any of the "good" value of the vegetable. Making these reminded me a bit of when I used to make latkes with my mother growing up, and maybe it made me enjoy them just a little more.

I Can't Believe it's Zucchini Fritters
Slight adaption from the amazing Smitten Kitchen.
Serves two
Calorie estimate for the entire recipe falls at 363, without counting the oil it is cooked in. It's hard to say how much is absorbed, but I would go ahead and just add 40 or so calories, leaving you at roughly 200 calories per serving!


1 pound of zucchini (I used three normal sized zucchini and this worked well.)
1 1/4 teaspoon salt
1 large egg, beaten
A few dashes of ground pepper
1/2 cup all purpose flour
1/2 tsp baking powder
2 tablespoons olive oil

Optional:
Low fat sour cream


  When I first started to make this recipe, I realized I forgot to buy one of the ingredients from the grocery store. I am convinced I would forget my head someplace if it weren't attached. Regardless, I trudged on, determined that the missing scallions wouldn't be missed too much. Start by chopping the ends of your zucchini off. Next you are going to take out your food processor. If you do not have one, you can just use a normal hand grater and grate your zucchini. If you are using the food processor, you are going to want to use the shredding blade. For my processor, it comes with a disc and one side is shred, the other is slice. Make sure you set it up properly, because this determines the consistency of your fritters.


   After you have pushed all of your zucchini through the food processor, you will have something like this. Add 1 teaspoon of salt to your heap of zucchini, toss and allow it to rest for ten minutes. While you are waiting, you can go ahead and mix your 1/2 cup flour and 1/2 teaspoon baking powder together in a small bowl. Set aside. Once the ten minutes have passed, now you will work on draining the moisture from the zucchini. I suggest using a strainer, then pushing down on the zucchini with a wooden spoon. There is a lot of water trapped in there, so don't skip this! If you don't do this properly, your fritters will get soggy. I found that placing the zucchini into a heavy duty paper towel and wringing it worked really well.


  After you remove all of the liquid, you should be left with something like this. You might want to add a little more salt to it for taste, since some was lost when you were wringing out the zucchini. 1/4 teaspoon did the trick for my batch. Add a couple dashes of pepper, and your beaten egg. Mix well. Now add your flour and baking powder mixture. Mix until well combined.


  To cook these, I broke out my beautiful cast iron skillet. If you don't have one, you can just use a normal large skillet. Add your olive oil to the pan and heat it to medium high. I kept my skillet at medium simply because for some reason my cast iron heats up more than my other skillets do.  Begin to pre-heat your oven to 200f. Once your oil is hot and bubbly, you can form small patties with either your hands like I did, or drop it down into the pan by the spoonful and flatten them with your spatula. Cook on each side until they are golden brown, or about three minutes. When they are done cooking, place them onto a cookie sheet covered with foil. Go ahead and stick your sheet with the fritters into the oven. You can add the other fritters into the oven as you cook. I set the timer for ten minutes from when I put in the first batch of fritters, and they came out fantastic.


  When you are done, you can add anything your heart desires to the fritters. I topped mine with a teaspoon of low fat sour cream. The me from three years ago is in awe at how great these are. Look at what i've been missing! Enjoy!

Sunday, September 4, 2011

Stickless, grilless, delicious steak kabobs.

    I love weekends. They are the only time off my husband gets, which i'm appreciative he gets any considering his occupation. Today we went out on an adventure, and came back home with the appetite to prove it. Let me start by saying that we do indeed own a nice little charcoal grill. It works perfectly fine, but for some reason whenever we actually use it things go awry. Last time we tried to heat the coals in a little chimney we have, the chimney that is supposed to be fire-resistant caught fire. Oops. After that mishap, we did not have enough coals left to cook our kabobs all the way through, so we opted to finish cooking them indoors on a skillet. After trying the lone kabob that cooked on our crippled grill, and one from the skillet we realized the skillet option is surprisingly tasty as well. This gave birth to my own recipe.

LC's Stickless, Grilless, Steak Kabobs
Serves two.


1 green bell pepper
1 white onion
1 large tomato
2 pounds of kabob meat. (If your grocery store doesn't sell pre-packaged beef kabob, I imagine chuck would work well.)
Olive oil, to coat the skillet
A few dashes of ground pepper
Your favorite seasoning. (My must have for steak is Cavender's Greek seasoning.)


   Just so you guys know, my husband is excited about my blog too. So excited, he in fact wanted to take some action shots of me chopping the day away. Start by pre-heating your skillet on medium with a small amount of olive oil. Now it's time to chop our veggies! You can leave them in bigger chunks like you normally would for kabobs, or deviate from the course and cut them smaller. I like deviating. I also like flying off on tangents. I like to leave my tomato chunks large, but I prefer to cut my onion in the same fashion I do for my Philly's. Same goes for the bell pepper.

  
   When you are done, you should have a beautiful pile like this. I really love the color that green pepper gives, but you can also use red if you want (or if you forget things at the grocery store like I do.) Now you can add your nicely chopped veggies into your heated skillet. Add a few dashes of ground pepper. Cook these for 3 minutes until they start to soften a bit. 


  Now let's focus on the meat. Usually I do not eat red meat, so don't expect too many recipes containing it. Red meat is known to heighten your pain receptors, so for people with chronic pain issues it is usually a big no-no... but i'm totally okay with love-hate relationships. Sometimes I spoil myself. That and my husband would surely divorce me if I banned red meat entirely. While your veggies are cooking, go ahead and sprinkle some of your seasoning of choice onto your meat. Don't smother it, but don't skimp either! 


   Once your three minutes are up, your veggies should look something like this! Go ahead and add your meat into the skillet at this point. Turn the heat up to medium high. (My stove uses numbers instead of words, so it sits smack in the middle of five and six.) Allow this to cook for eight minutes covered, stirring a few times to make sure your meat cooks evenly. You will want to drain this a few times. I had to drain mine twice. This eliminates a lot of the fat from the meat and allows things to cook more efficiently. Your real gauge for time is if your meat is well browned. If you still need more time, don't feel bad for bending the rules a little bit!


     And now the best part of every meal. Consumption! You can easily serve this over a bed of rice. We prefer to eat it with beans, because that's just how we roll. This will leave you with a little bit of leftovers! I hope everyone has a happy and safe Labor day! Enjoy!

Saturday, September 3, 2011

Skinny Philly

   Today my husband had a date. A date with his friend, to play Nintendo 64. Goldeneye more exactly. If you were wondering, no, they don't ever grow up. I had to come up with something we could eat within a 30 minute window from prep to consumption so we could be done and cleaned up in time for him to play. We opted for one of my new favorite's, a variation of Hungry Girl's Philly Burger.

   Before I get to the recipe, let me give you all a little background. My husband is active duty in the Navy, and when we first met one of the things he obsessed over was the Philly Cheesesteaks they made in the galley at his base in West Virginia. Undeniably, they were incredible. A perfect marriage of flavors! However, the combo of meat, cheese and a giant piece of bread doesn't calculate to a low calorie option. With HG's help, I was able to get what my husband called "as close as possible" to that legendary sandwich he loves so much all while landing well below 400 calories per sandwich.

LC's Skinny Philly
Slight variation of Hungry Girl's Philly burger swap.
Serves 2 adults


1 white onion, diced
1 green pepper
2 slices of fat free American cheese (I use Kraft.)
4 teaspoons light sour cream
2 Boca burgers. (Keep in mind the different varieties have different amounts of calories, the one I use has 70.)
Olive oil, for skillet
A few dashes of pepper
4 slices of 50 calorie bread, or sandwich thins.


This meal is super easy and filling. We'll start by pre-heating our skillet on medium heat with just enough olive oil added to coat the pan. Continue by taking our onion and removing the outer layer. I usually cut the onion in two, then cut the halves into two and slice them thinly. (Not paper thin, but thick enough that they will soften nicely in the skillet) Take your green pepper, slice it in half. Remove the seeds, and then slice the remaining pepper. Cut these in half so they aren't quite so long. (You'll appreciate this when you are actually eating it later! Otherwise it can be difficult to eat!) You should now have something like the picture above! I love the way freshly cut veggies look. Now we are ready to add these into our pre-heated skillet.


Allow your veggies to cook on medium for three minutes. Add a few dashes of pepper just to season lightly. Stir occasionally to make sure they don't burn completely on the bottom, and just soften slightly.


Meanwhile, we can practice multi-tasking.. which doesn't always pan out well for me, but hey, we can try! Start tearing up your sliced cheese into little bits, and add them into the bowl. Please ignore that I have more then I wrote. I was making more because my husband wanted extra! Add 4 teaspoons of light sour cream to the bowl, and stir until the sour cream has coated the cheese. Set aside for right now, I bet your timer is screaming at you.


Using a spatula, shift your veggies over to one side of the skillet. This will be the area where you will cook your burgers. Don't worry if you don't have much space to work with, since you won't really need to stir your veggies anymore after this point.  Cook your burgers for 4 minutes on each side, so eight minutes collectively. If you want to toast your bread, I suggest you do that before your burgers are done cooking so you are ready to build your awesome creation as soon as you can.


Now that your burgers are nearing completion, let's get back to what is really important. Cheese. I love cheese, don't you? Cheese will be the death of me, and my waistline. Not today! Take your bowl and place it into the microwave. Nuke it for 15 seconds. Take your bowl out and stir the mixture so it is well combined. Place it back into the microwave again, and nuke it for another 10 seconds. Stir once more so it is well combined, and your end result will be the above. Perfectly smooth, cheesy deliciousness.


Finally you are ready to assemble! You can make this however you wish. Heck, you can even eat it without bread if you want to cut even more calories. Don't feel bad if you have just a little extra veggies. I use a lot because I like to pile them high! The way I prepared mine, it falls at 270 calories per burger. Enjoy!